Skip to Content

TECHNICAL CENTER / PROJECT CONTROL

Judging from the scene,
to the material plan.

Technical support is not the accumulation of parameters, but the decision-making sequence before construction.

The lack of any one of the base, environment, nodes, material levels, templates, protection and maintenance may lead to wrong results for the right product.

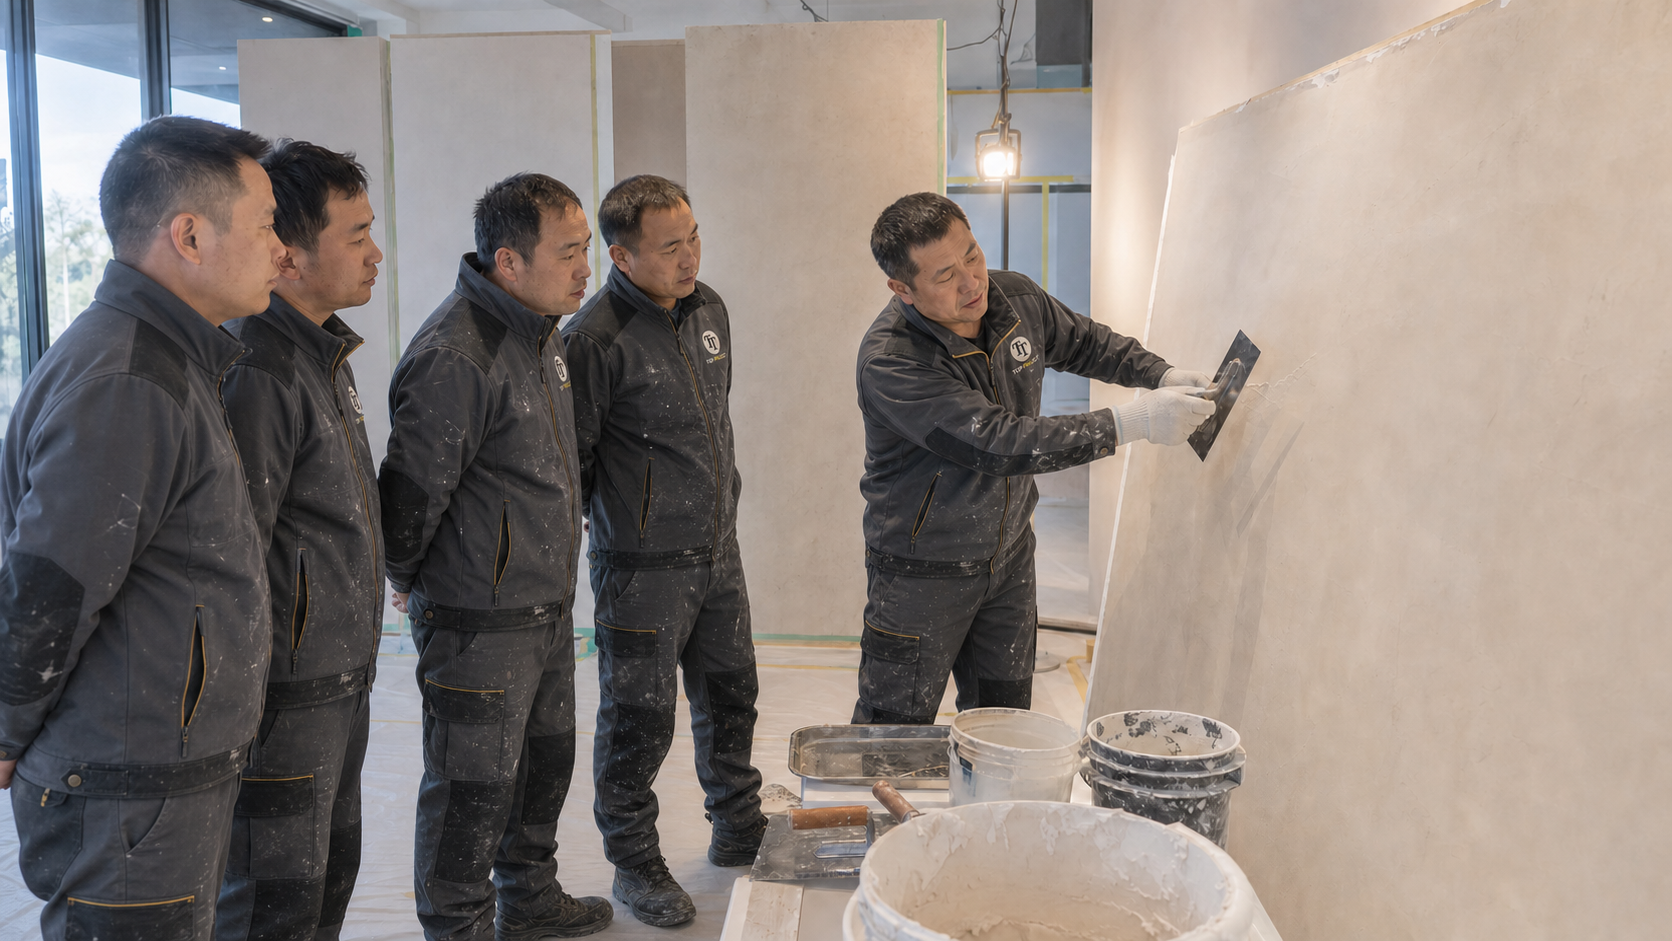
TOP PROJECT technical lecturer demonstrated the microcement scraping method to the construction team at the construction site
ON-SITE TRAININGTurn technical requirements into construction actions.

On-site explanation of grassroots level, large sample, tool angle and scraping rhythm.

Grassroots levelenvironmentsystemmodelconstructionmaintenance

01 / START FROM THE TASK

Starting from the problem,
Find the corresponding technical path.

Customers are not required to understand the name of the material first. Start with the current task first, and then hand over the problem to the corresponding material system and technical document.

02 / EIGHT CONTROL POINTS

Eight types of on-site problems,
Confirm item by item before construction.

Click on the title to view the inspection sequence directly. A framework for judgment is provided here, without a single number replacing on-site inspection.

01Base strength and stabilityHollowing · Chalking · Cracking · Displacement

The facing layer does not reinforce the failed base layer or absorb ongoing structural movements.

  • Check the empty drum by tapping and remove loose, powdery and contaminated layers.
  • Distinguish between stable cracks, active cracks and structural cracks, and record their locations and changes.
  • Confirm that the screed, tiles, boards and interfaces between different materials are secure.
02Damp, leakage and water hazardsReturn of moisture · Water vapor · Pipe root · Exterior wall

Breathable paint is not a waterproof layer, nor do microcement and resin finishes seal in ongoing water sources.

  • First determine whether the water comes from leakage, condensation, capillary rise or residual moisture from construction.
  • Check bathroom, window edges, exterior walls, roofs, pipe roots and ground moisture paths.
  • After the water source has been eliminated and drying is complete, determine the primer and finish system.
See examples of moisture bulge treatment →
03Base absorbency and interface treatmentCement · Plaster · Tile · Old paint

Different base layers require different interface treatments, and the primer is not the same material that can be universally replaced.

  • Determine whether the base layer is an absorbent, low-absorbent, or non-absorbent surface.
  • The old coating is first inspected for adhesion and compatibility, and the ceramic tiles focus on seam development.
  • After the primer is completed, make a small area adhesion sample before entering the complete system.
04Nodes, seams and interfaces of different materialsYin and Yang angle · expansion joint · doorway · pipe root

"Seamless vision" does not mean canceling the active seams and functional nodes that must be retained in the building.

  • Structural joints, expansion joints and continuous displacement joints must continue correctly in the facing.
  • Yin and Yang corners, countertop edges, stair treads and doorways need to be individually reinforced or closed.
  • Drainage, slope and pipe root waterproofing should be inspected before the decorative layer.
05Material ratio, mixing and opening timeA/B components · Color paste · Batch · Temperature and humidity

The mixing ratio, mixing sequence and usable time of different products cannot be applied to each other.

  • The valid technical table and packaging instructions of the current batch shall prevail, and the parameters of the old version will not be used.
  • Record the ambient temperature and humidity, material temperature, start stirring and stop use time.
  • Two-component materials must not be used beyond the opening time by adding water or stirring again.
06Reference dosage and drying between layersArea · Roughness · Number of layers · Loss

The theoretical coverage is only used for preliminary estimation, and the actual consumption depends on the roughness of the base layer, tools and construction techniques.

  • First confirm the net construction area, number of product layers and theoretical dosage of each layer.
  • Base layer loss, tool residue and on-site repairs are added to infer the quality without using a single barrel area.
  • The waiting time between layers is based on actual drying and technical documents, not just a fixed number of hours.
07Color, texture and solid templatesTools · Light · Technique · Protective Layer

The color card can only select the direction, and the sample must confirm the color, texture, gloss and construction continuity at the same time.

  • Complete the mockup using formal materials, actual tools, and planned construction crews.
  • Observe under natural light, artificial light and side light respectively.
  • Record the scraping direction, dilution, number of layers, protective layer and sign-off standards.
Go to Color & Sample Center →
08Protection, conservation and post-maintenanceSealing · Covering · Curing · Cleaning

Surface dryness does not mean complete curing. Early traffic, water accumulation and intensive cleaning will damage the protective system.

  • Confirm sealing, final protective coat, gloss and intercoat waiting requirements.
  • Time boundaries for light loading, full cure and first cleaning are indicated before delivery.
  • Develop methods for furniture floor mats, cleaning agents, water treatment and local repairs.

03 / ON-SITE TRAINING

Product knowledge and construction actions,
Equally important.

Technical training focuses on material identification, grassroots judgment, tool movements, equipment debugging and delivery standards. Each scenario corresponds to a specific decision in the project, so there is no one set of practices for handling all materials.

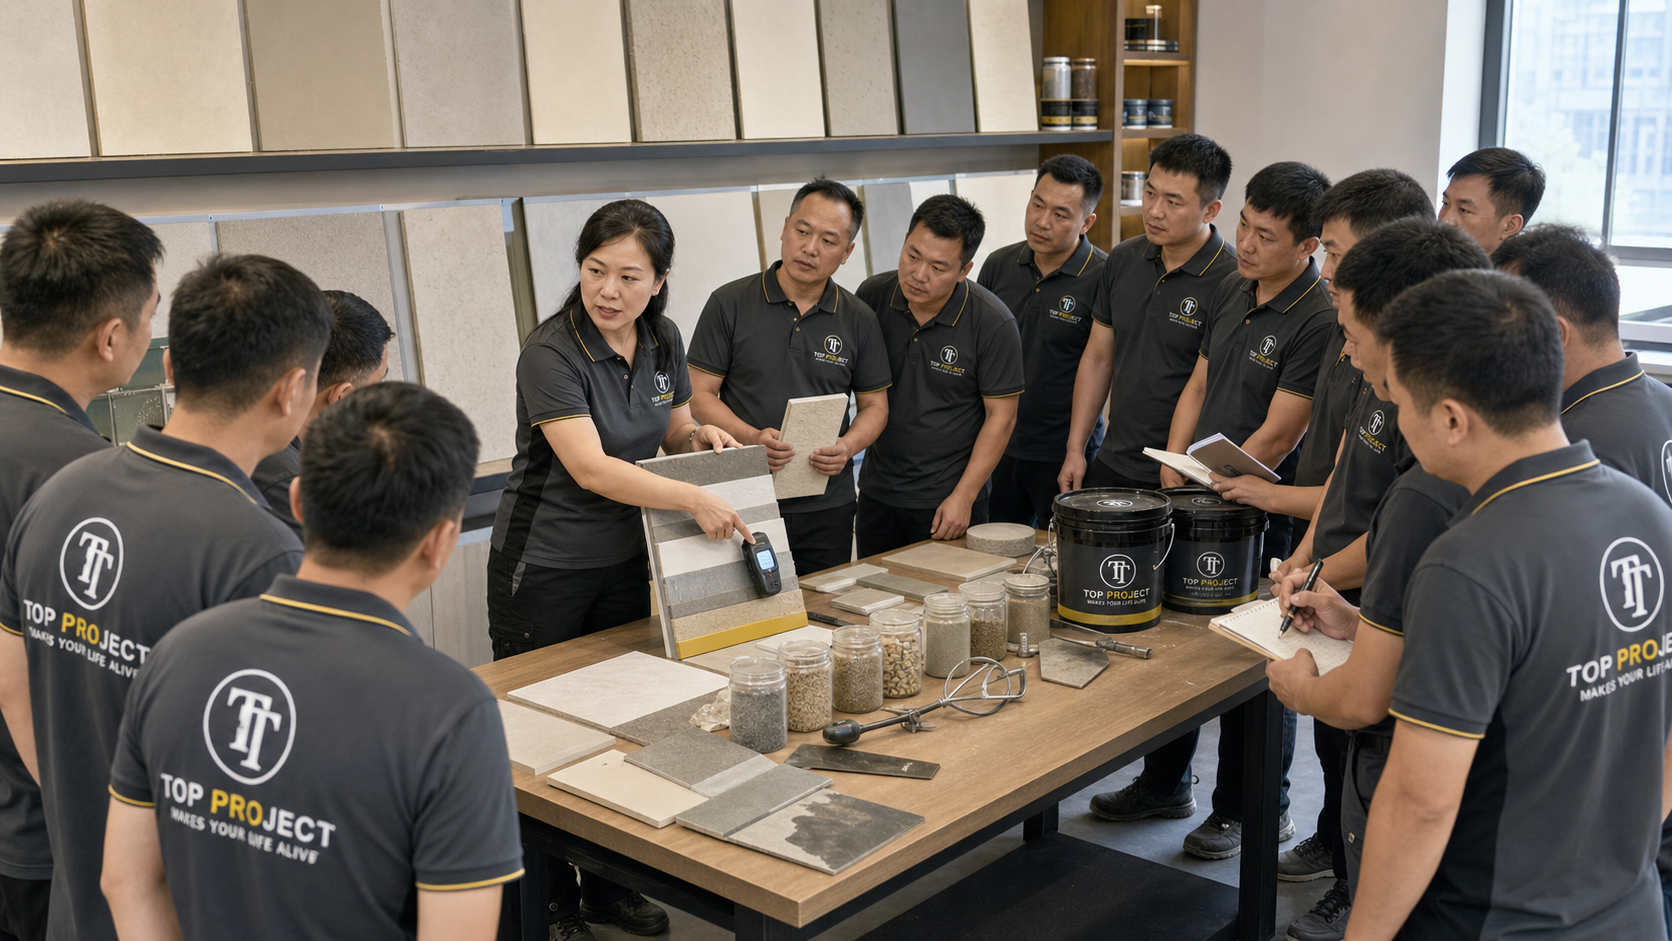
TOP PROJECT technical instructor explains material levels, prototypes and testing instruments to the construction team
01 / SYSTEMUnderstand the material hierarchy first before entering the scene.

Unify the relationship between primer, base coat, finish and protective layer through physical templates, particles, instruments and tools.

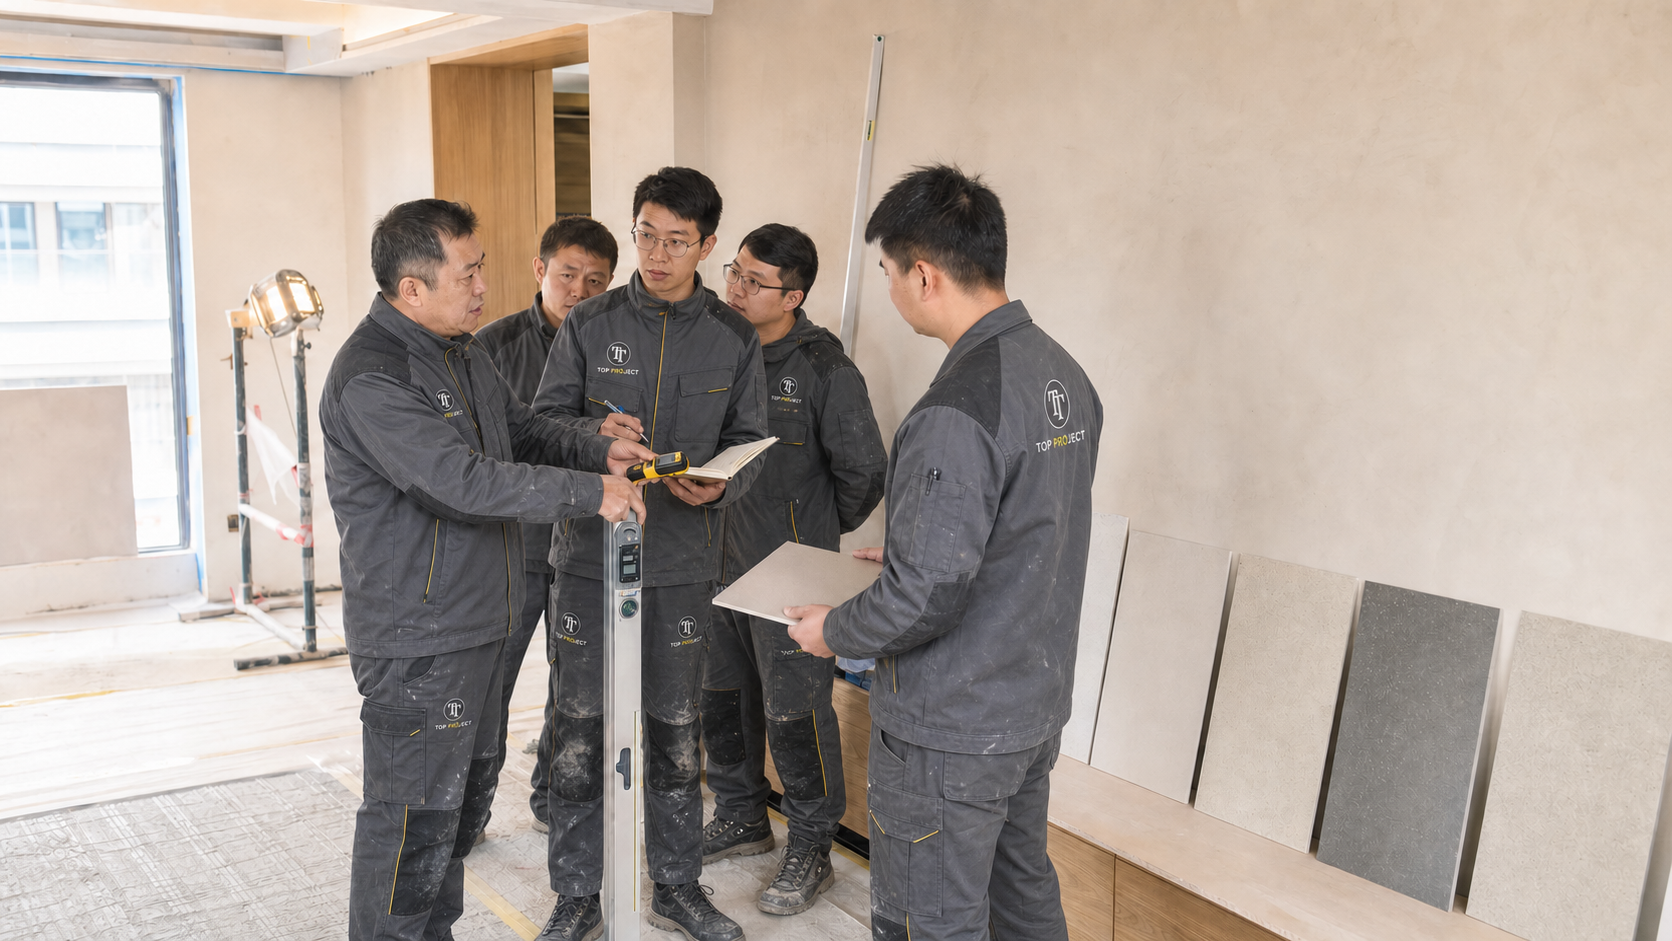
TOP PROJECT technical team checked the base test results and decorative samples on site
02 / BRIEFINGCommunicate at the grassroots level

Keep test values, node locations, samples and acceptance targets in the same on-site communication.

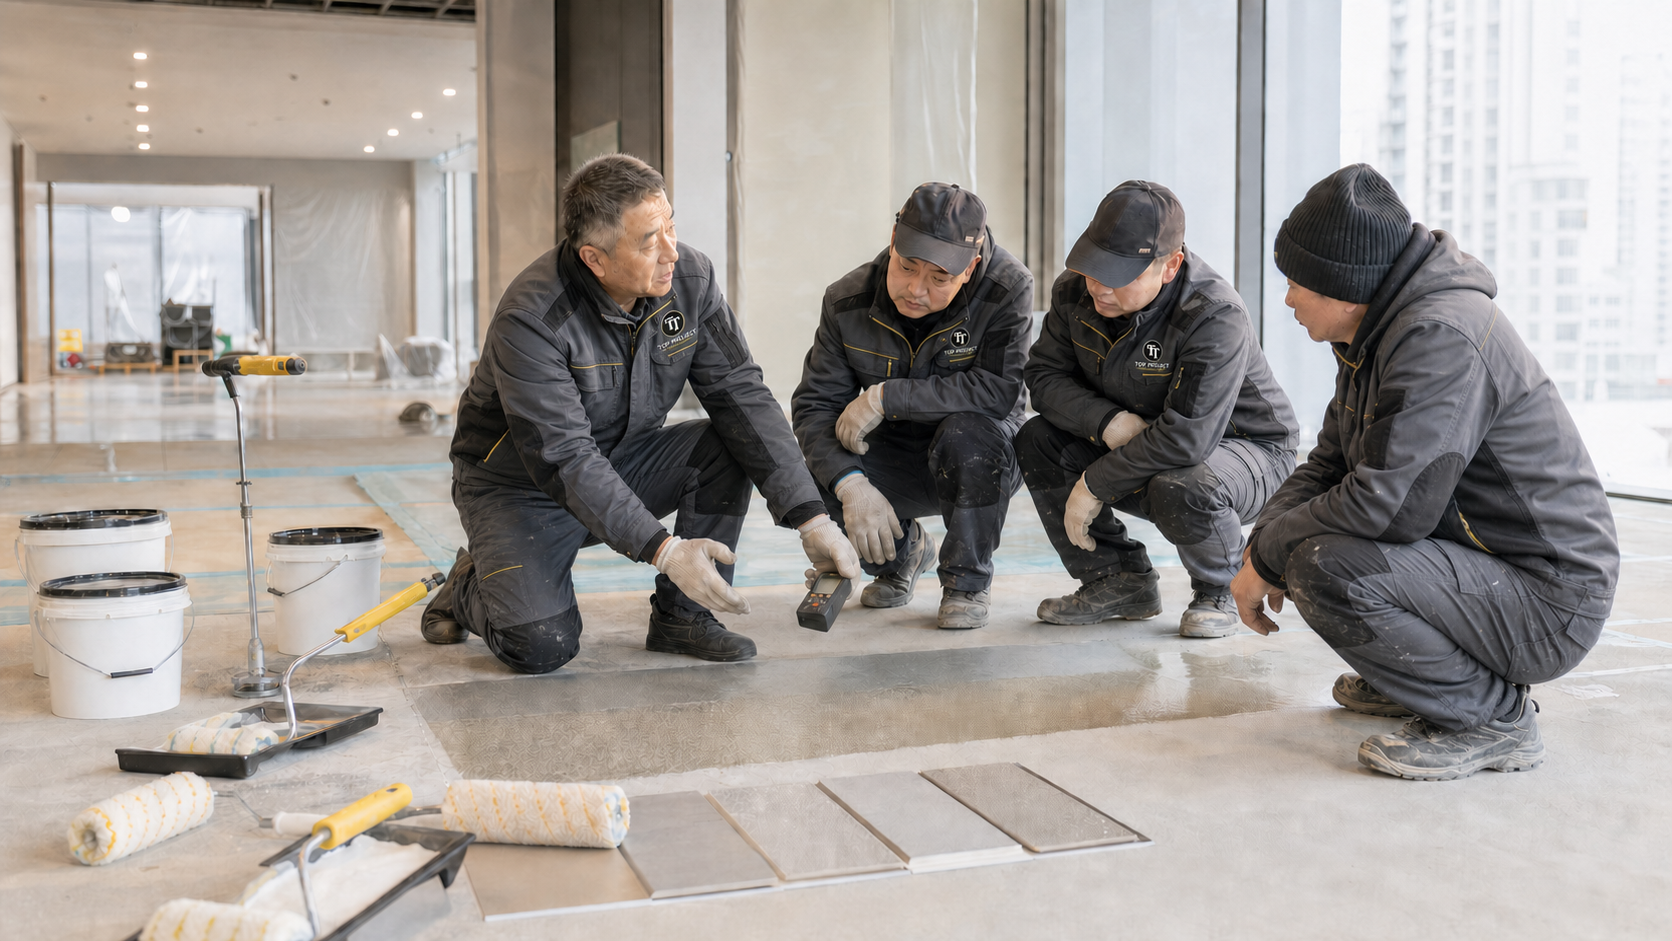
TOP PROJECT technical team inspects the continuous ground base at the construction site
03 / DIAGNOSISGrassroots testing

Confirm flatness, strength, moisture risk and absorption differences before deciding on material routing.

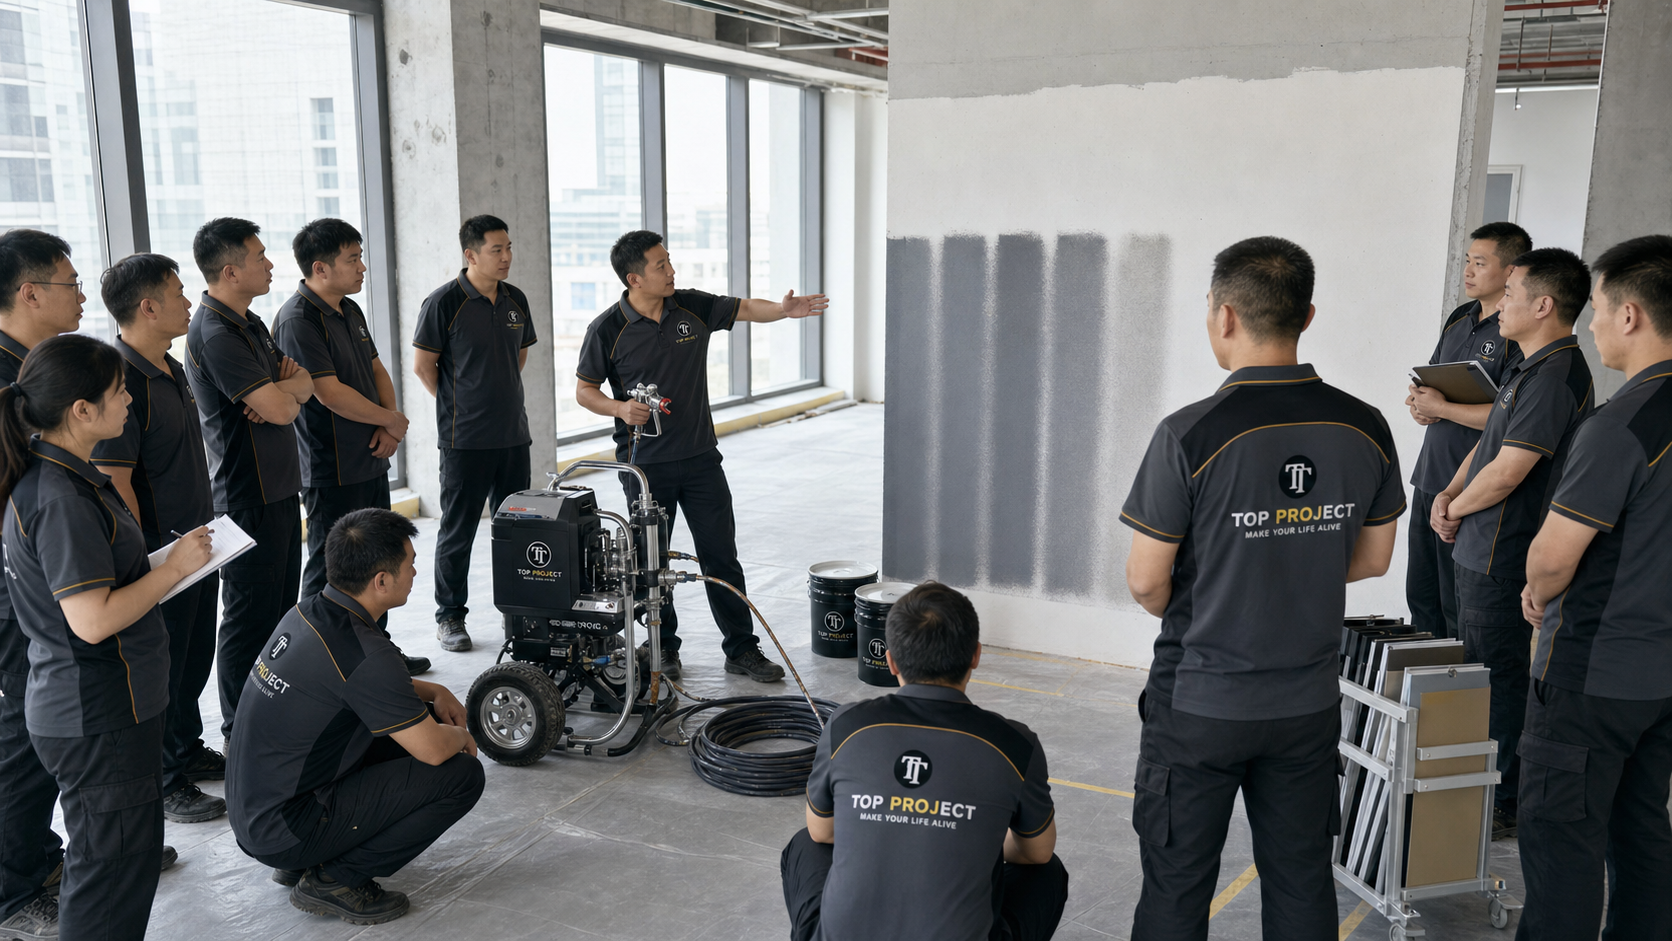
TOP PROJECT technical instructor demonstrates the scraping angle of wall finishing materials
04 / APPLICATIONmotion calibration

Use the same sample to confirm tool angle, scraping direction, succession rhythm and grain boundaries.

TOP PROJECT technical lecturer explains airless spray equipment and spray pattern testing to the construction team
05 / EQUIPMENTEquipment training

Calibrate the pressure, spray distance, spray width and overlap range before formal construction, and clarify the safe operation sequence.

04 / SYSTEM-SPECIFIC LOGIC

Four sets of materials,
Four clear technical paths.

Select the material system first, and then check the corresponding base layer, construction and acceptance points. Parameters from different systems must not be cross-referenced.

TOP PROJECT / MICROCEMENT

The complete system determines the final surface quality.

Base treatment, enhancement, base layer, finish, sealing and final protection each have different responsibilities.

Before construction
Stabilizes base, cracks and joints, moisture risk, absorptivity and target use location
Under construction
Ratio, mixing, layer thickness, scraping direction, interlayer drying and polishing control
Before delivery
Complete sealing and finish, target gloss, curing time and maintenance instructions
cannot be replaced
Structural repairs, screeds, waterproofing and expansion joints that must be retained

05 / SIX PROJECT GATES

Six quality levels,
Confirmation step by step.

Each step should result in a recordable result: photos, measurements, prototypes, batches, construction records or delivery instructions.

  1. 01
    Grassroots acceptance

    Strength, smoothing, contamination, moisture risk, cracks and joint completion records.

    SUBSTRATE
  2. 02
    System confirmation

    Material layers, primers, enhancements, finishes, protection and application boundaries are clearly defined.

    SYSTEM
  3. 03
    Entity template

    Color, texture, gloss, tools, personnel and acceptance criteria complete sign-off.

    SAMPLE
  4. 04
    construction conditions

    Temperature and humidity, ventilation, cross operations, material batches and construction rhythm are controlled.

    CONDITION
  5. 05
    process record

    The ratio, dosage, time, number of layers, polishing, abnormalities and repairs can all be traced.

    RECORD
  6. 06
    Maintenance delivery

    Light load, fully cured, first cleaning, furniture protection and maintenance instructions are clear.

    HANDOVER

06 / VERIFIED DOCUMENTS

Version and scope of technical documents,
Equally important.

The current collection of publicly verifiable original documents is at Graphenstone. Other systems first link to the product page where the data verification has been completed, without taking screenshots or old files disguised as current downloads.

TOP PROJECTParameters have been organized to the product page

The differences between the current catalog and the historical technical table have been clearly marked, and the current batch still needs to be reviewed before official supply.

View microcement product data →
DURITEProduct data has been classified and verified

The dosage, packaging, number of construction passes and ARMONIA technical conditions of the five finishes have been verified; the corresponding batch original documents are provided on a project-by-project basis.

View art coating technical content →
POLYTECAlbum system and parameters have been checked

Micropox levels, reference dosages, drying and Pavipol W protection relationships are now available on the product page.

View Polytec technical content →